To sign up with Nettica, click “My Account” and then click “Login”. You will be prompted to create an account if you do not have one. You may be asked to verify your email address.
Our templated configurations work out of the box, allowing you to create and connect devices effortlessly. It only takes a few minutes to create your first WireGuard VPN, not hours or days. To learn more about our architecture, check out our overview. You can complete this tutorial without making any purchases. We offer more for free than most provide to their paying customers.
Creating Your First Network
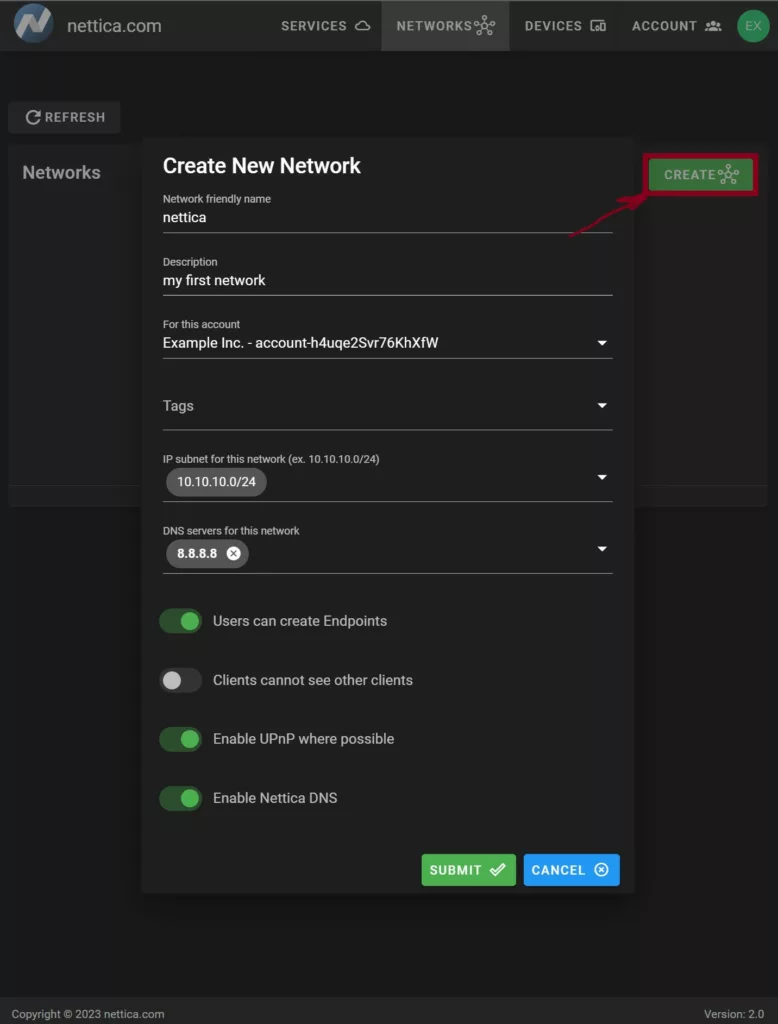
A virtual private network (VPN) is a collection of devices that can securely communicate with one another. Creating a network is quick and easy. Login to the Nettica Admin using the same credentials you used to sign up with Nettica, then click on the Networks tab and click “Create”:

Fill in the required fields.
- The friendly name is the name of your network. It will become the network interface name used by all devices in the network. In our example, we have specified
nettica. - Use
10.10.10.0/24for the IP subnet of this network. In the improbable event that another network uses this subnet, please pick a different one.
Click “Submit” to create the network.
Install Nettica Agent
Install the Nettica Agent for Windows, Debian distros, or Fedora Linux distributions. In this tutorial, we will install the Agent on two devices. This could be your desktop and your laptop, or in the cloud with one of our pre-built images, or even with a Raspberry Pi you might have lying around. If you are interested in subnet routing (eg, accessing your entire home network remotely), you will want to use Linux for one of the devices. If nothing else, you can also spin up a small VM on your desktop machine (with bridged mode networking).
Creating a Device
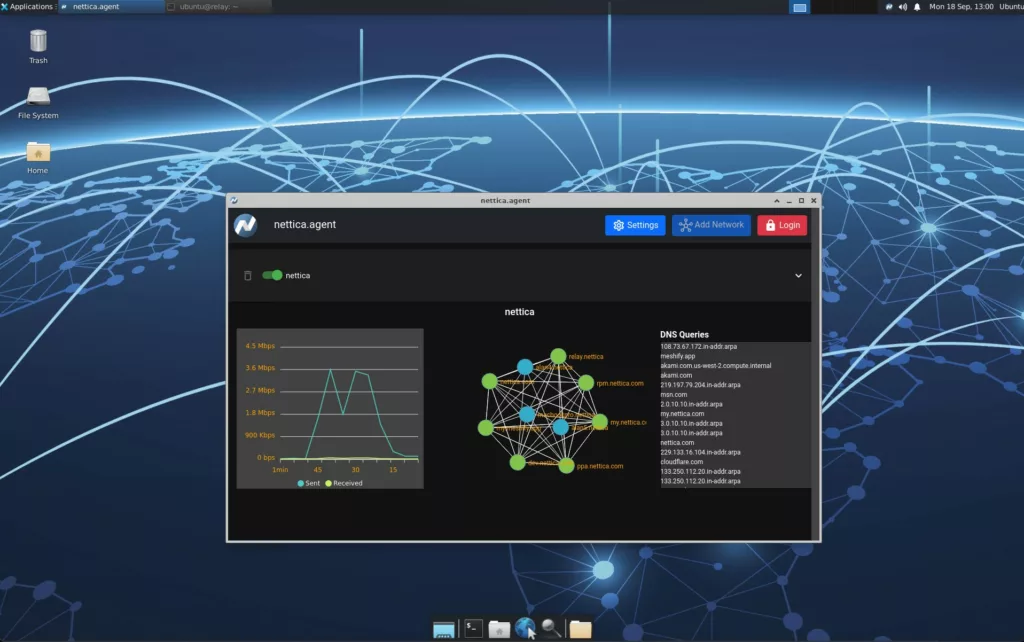
If your host doesn’t have a GUI (eg, Linux server) follow these instructions on adding a device manually. Otherwise, log in to the host and launch the Nettica Agent using the icon on your desktop. On Linux, you can find it under Internet on the Applications menu, or the Applications page.

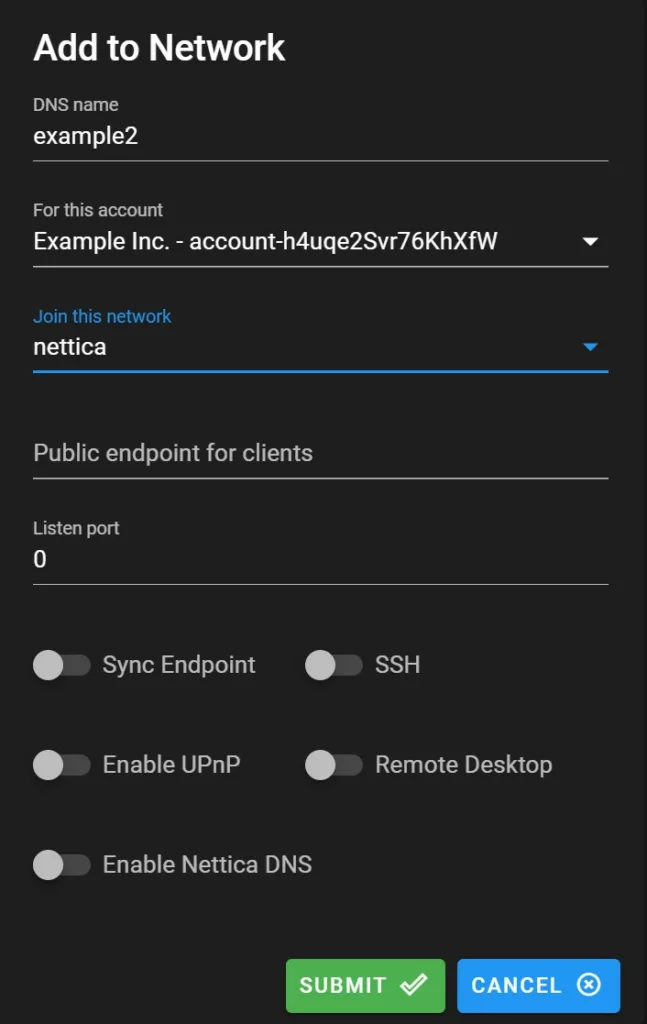
Click Login and sign in using the same credentials you used previously. Click “Add Network” and fill in the form.

If the device you’re adding is only going to be used as a client (for example, a laptop), then you can skip the public endpoint and listen port fields. Otherwise, for the public endpoint enter your public IP address, colon, port number. If you don’t know what your public IP address is, enter 1.2.3.4:51820 and toggle Sync Endpoint. Enter 51820 for the listen port. Our pre-built VMs come with UDP port 51820 open. Update any security groups or firewalls as necessary. Click Submit.
Congratulations! You have successfully added your first device to your VPN. However, with a VPN service it takes two to tango, so repeat the process and launch another instance. Or, install the agent locally on your laptop. You should then be able to open a terminal and ping 10.10.10.1 (the instance created above will have this IP address). If you have any difficulties, contact Nettica Support and we will be more than happy to help! You can also chat with us by clicking below (when available).
