One of the best features of Windows is its remote desktop functionality. Back in the early days of the Internet it was no problem configuring your home PC to be accessible from anywhere. Enable it, open some ports on your router, and you were done. However, these days securely configuring remote desktop is more difficult. Bots are constantly probing for open port 3389 (the port used by RDP), and if your ISP is someone like Xfinity, they will automatically block the port when a bot has been detected, defeating the whole purpose of having the port open. There have also been security bugs discovered in RDP which has made running RDP on an open port a dangerous undertaking.
Nettica addresses these concerns and makes it once again safe to connect back to your home PC with remote desktop. Nettica allows you to create a light-weight, secure VPN connection to your home. And it’s free! Once you see how useful we are, you may be interested in one of our paid plans that really lets you take control of your network.
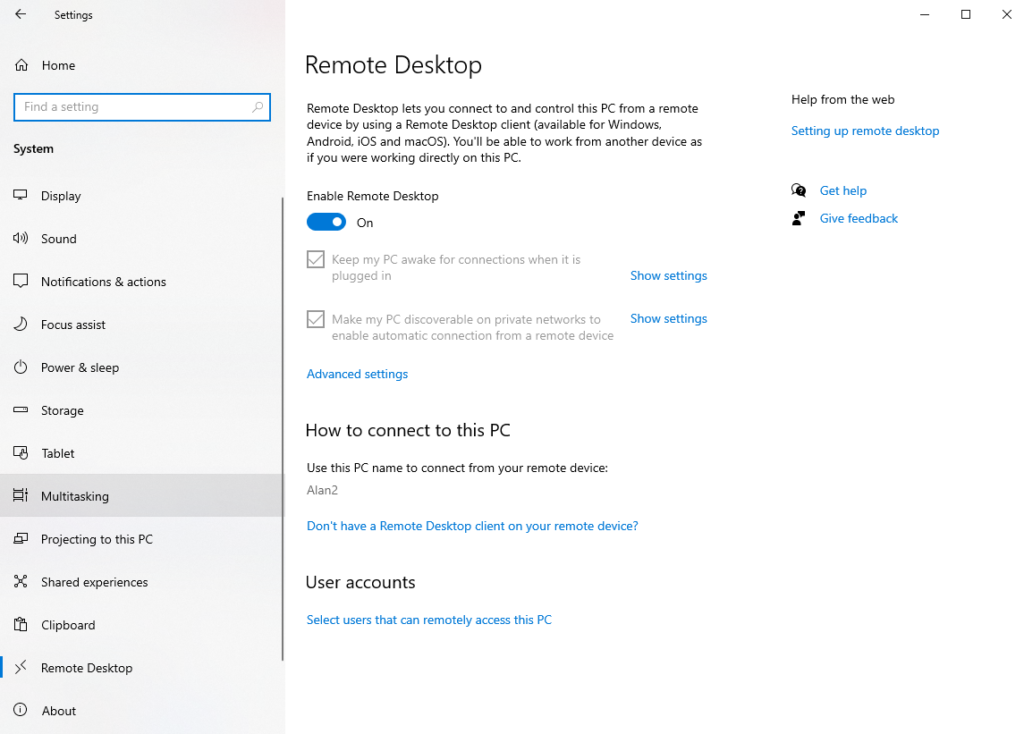
The first thing you need to do to setup remote desktop is to enable it. On a Windows 10 Pro machine, go to Settings, System, and then click on Remote Desktop in the left-hand menu.

Click on “Enable Remote Desktop” to enable it. Now, it’s time to setup the VPN.
Creating a New Network
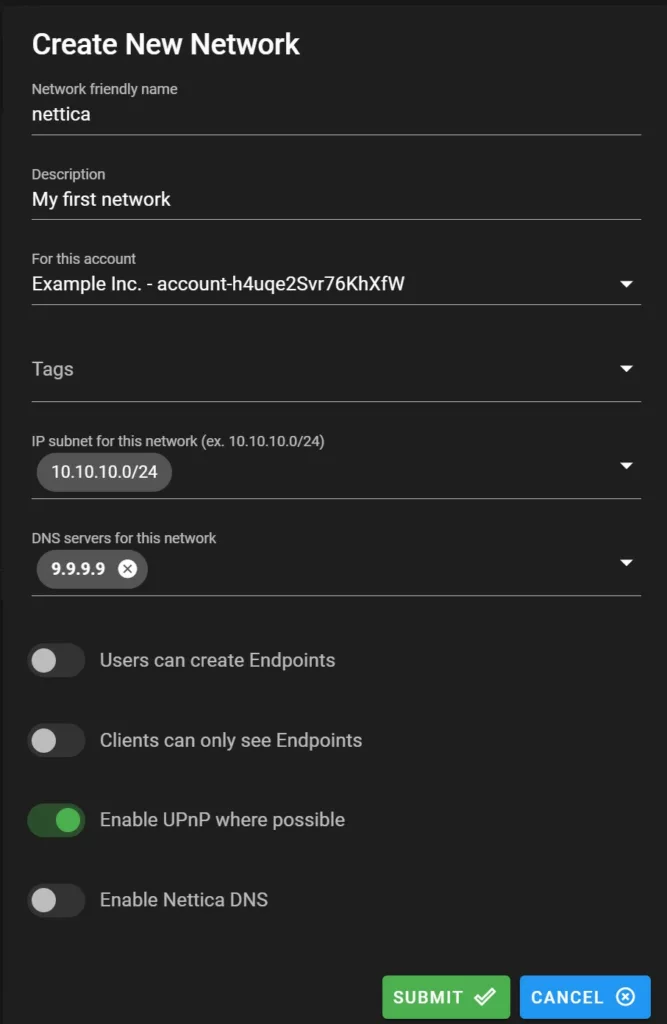
Login to the Nettica Admin. Note that you can login using your Google or Microsoft account rather than storing credentials with us. We are not interested in managing your credentials. You can use your own identity provider and get all their benefits, such as multi-factor authentication. After logging in, click on Networks and click “Create”.

Name your network, in our case we chose “nettica”. The name you choose here will show up in Task Manager (or ifconfig or ip addr on Linux) so you can be creative, or you can just call it “home”. You will also need to specify the IP subnet. For this enter 10.10.10.0/24 and press tab. In the unlikely event that your local network uses this subnet, choose another, such as 10.0.0.0/24, 192.168.100.0/24, or any internal-use subnet. We will assign and distribute IP addresses based on what you enter here. With Nettica you get to choose your IP subnets for your VPN, and if you need a machine to have a specific IP address (in the subnet you’ve defined), you can do that. If you’d like to specify DNS servers enter them next. We’ve specified 9.9.9.9 above. Enable UPnP and then click Submit.
Adding a Window Host
After creating the network, you need to add your computer to it. For this download the Nettica Agent for Windows. Follow the instructions and install the client.
Launch the Nettica Agent and click the Login button. A browser window will pop-up to assist you with the login. Login the same way you originally logged into the admin. After successful login, click on “Add Network”.

You will be presented with the above dialog. Name your device, select “nettica” for your network, and yes, enter 1.2.3.4:51820 for the endpoint. Check the boxes for Sync Endpoint, UPnP and remote desktop, then click “Submit”. After a few seconds the network will appear in the UI. You will notice the endpoint has been updated to your external IP address. The port has also been opened by UPnP.
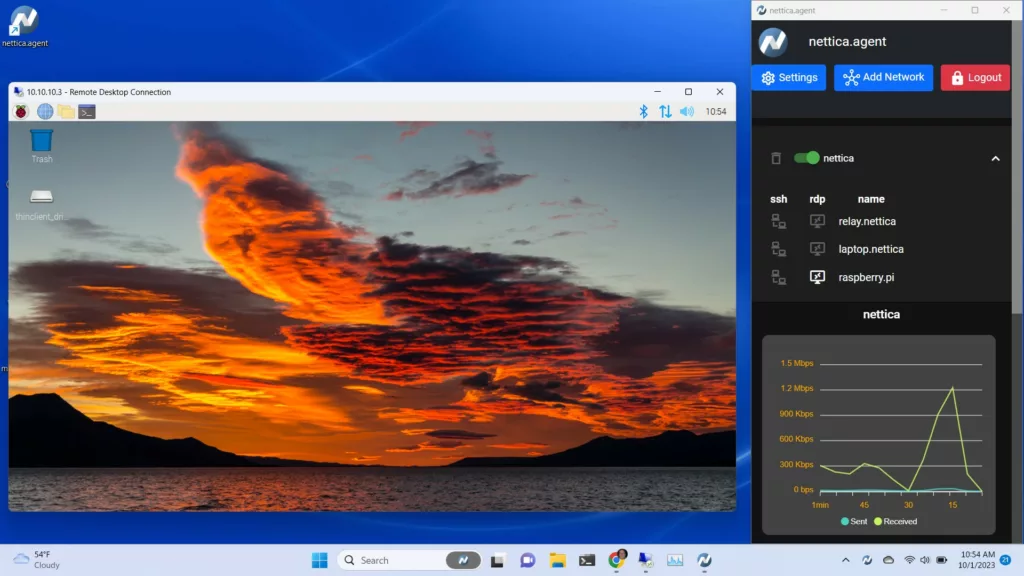
You have now successfully configured your home machine to be securely accessible from the internet. Repeat the process of adding a windows host for your laptop, and then head off to a coffee shop to test your connection. Enjoy!

