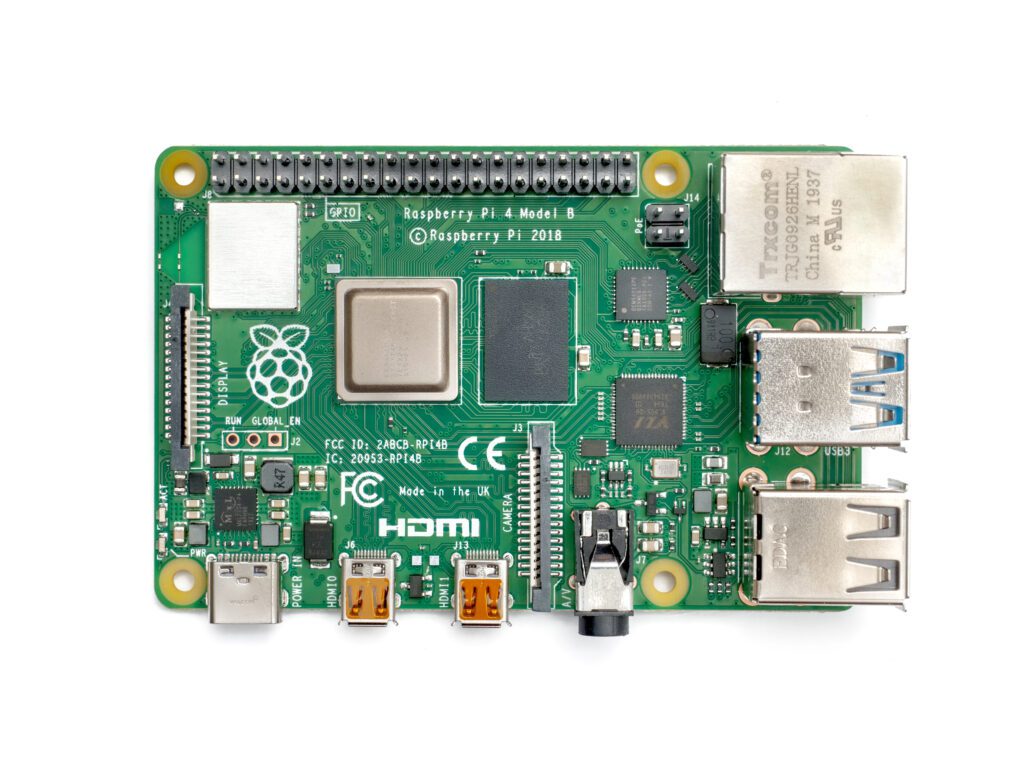
We love Raspberry Pis! If you don’t have one then you should get one. They are a great introduction to Linux and work well with our service. We recommend a Raspberry Pi 4 with 4GB of memory. Parts of the Nettica Agent were written on a Pi, and we have Pi-specific builds in our Debian repo. With a Raspberry Pi on your home network, you can use Nettica VPN service and WireGuard to enable subnet routing, which allows you to access your entire home network from anywhere, for free. Plus, the device itself has many capabilities. You can run a web server, media player, or even a video conferencing server. It’s a powerful little box.

Overview
Our service allows you to quickly and correctly configure WireGuard in a scalable manner. If you’ve ever set up WireGuard by hand, then you already know how difficult it is to maintain and synchronize configurations. That’s where we come in. We provide a control panel that lets you fully configure WireGuard to meet your needs, and then will automatically update your hosts in near real-time as changes are made.
We employ a zero-trust model for our service. What does that mean? In short, all access is validated and there is no trust between devices by default. We allow you to use your Google or Microsoft accounts to sign in to our service. While we do offer an option of signing up with us directly, we’d rather you maintain one less password and use your existing authentication provider, with all of its multi-factor authentication (if enabled). Enterprise customers will be happy to know we can integrate with your Google or Microsoft Entra ID and then automatically give your employees access.
Installation on Raspberry Pi
First, let’s install the Nettica Agent on your Raspberry Pi. We support both the 32-bit and 64-bit Raspberry Pi OS variants. Open a terminal and enter the following:
sudo curl -s -o /etc/apt/sources.list.d/nettica.list https://ppa.nettica.com/nettica.list
curl https://ppa.nettica.com/nettica.gpg | sudo gpg -o /usr/share/keyrings/nettica.gpg --dearmor --batch --yes

sudo apt update

# Install wireguard if not already installed, as well as resolvconf
sudo apt install wireguard resolvconf rdesktop iptables

# Install nettica-client and then nettica.agent
sudo apt install nettica-client nettica.agent

nettica.agent &

# Install Remote Desktop for Pi (optional, but very useful)
sudo apt install xrdp
sudo nano /etc/sysctl.conf
# Uncomment the next line to enable packet forwarding for IPv4
net.ipv4.ip_forward=1

# Ctrl-X to save the file
sudo sysctl -p
Copy and paste the code block above into the terminal window to install the Nettica Agent. It will automatically install the version appropriate for your Pi.
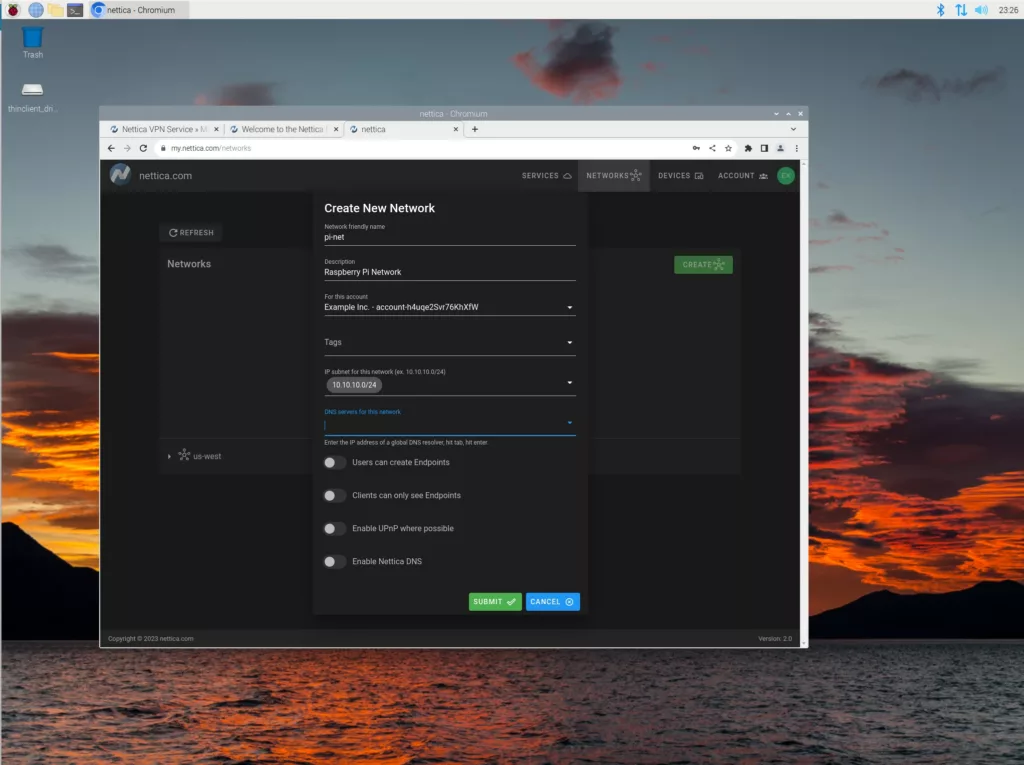
The next thing to do is make a network on Nettica. To make a network, use a browser to log in to the Nettica Admin and click on Networks, and then click “Create”. Name your network pi-net, and use 10.10.10.0/24 for the subnet.

You’ll find the Nettica Agent under Internet in the start menu. Open it and log in using the same credentials you used previously.
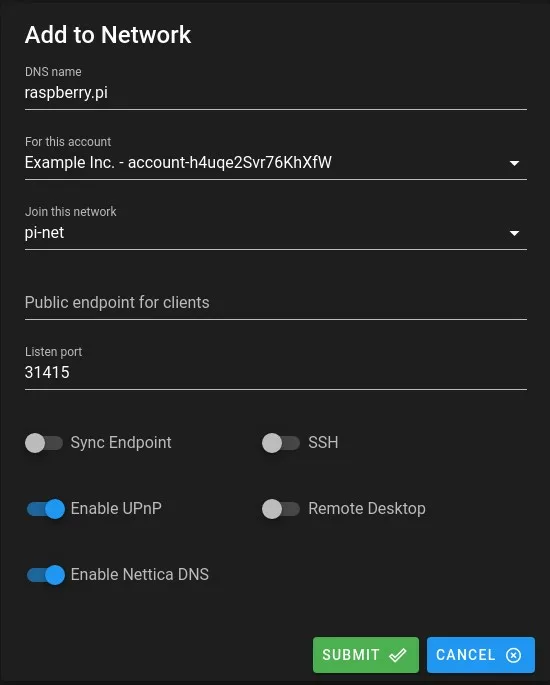
Click “Add Network” and complete the form. Click Submit and a few seconds later, your pi will be configured.

Enable Subnet Routing on a Raspberry Pi
Note: As of bookworm, Raspberry Pi OS no longer installs iptables by default. You may have noticed we installed it above. This is needed to configure subnet routing.
Enabling subnet routing allows you to connect to other machines besides the Raspberry Pi. To do this, log in to the Admin Console again and then click on “Networks”, expand the pi-net network, and select your pi. Then click edit in the right-hand pane. Click “Advanced Configuration”.
Enable subnet routing, UPnP, and Nettica DNS. Add your home’s local subnet, 192.168.12.0/24 in the example below, to the Allowed IPs. Click Submit, and then go back and edit the entry again. You’ll notice that PostUp and PostDown scripts have been written for you. These are the proper values for a Raspberry Pi using the wired connection, eth0.
But Raspberry Pi 4s come with two network connections. We recommend the wired connection connected directly to your internet gateway. However, if that’s not possible it also has built-in Wi-Fi. If you’re using Wi-Fi, modify the PostUp and PostDown scripts to point to wlan0 instead of eth0.

Add your External IP Address
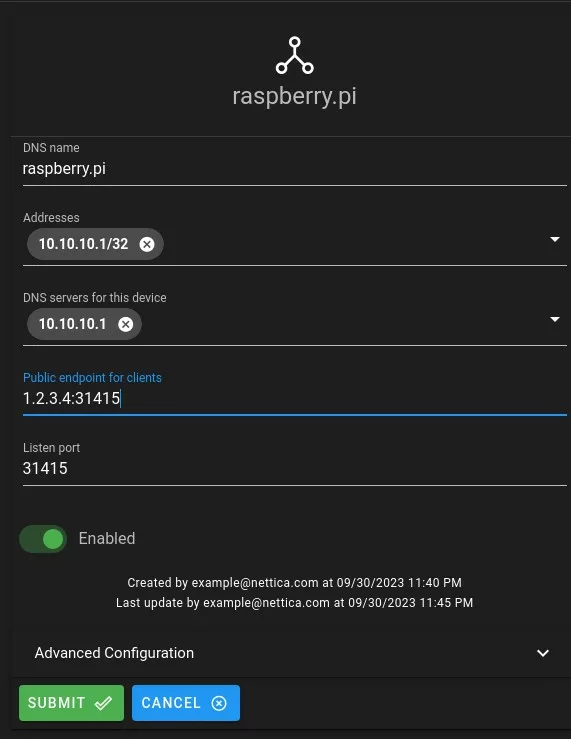
Next, you’ll need to add your external IP address and pick a port number for your Raspberry. We like to use 31415 as the port number for Pis. If you have multiple devices in your home network with Nettica VPN Service, then you should use a different port for each of them. If you have the same host in multiple networks, then each network should get a unique port as well.

Enter your public endpoint information and save it. With UPnP enabled, we’ll open the port on your router automatically. We can also automatically keep your IP address in sync with UPnP, or Sync Endpoint. If your router does not support UPnP, then you’ll need to manually configure port forwarding and use Sync Endpoint. With UPnP or Sync Endpoint, you can literally enter 1.2.3.4:31415 as we have above, and it will automatically update to the correct external IP address.
Test your Connection to the Raspberry Pi
Using your laptop with Nettica Agent installed and configured (and tethered to your phone’s internet), you should now be able to connect back to your Pi directly, as well as all the other machines in your home. The packets for your home network are routed through the Pi after being securely transported using WireGuard. And then the reverse happens with the responses, with the Pi securely encrypting the traffic back to your laptop.
Note that enabling Nettica DNS does not cause name resolution for machines in your home network that do not have a Nettica Agent. However, you can connect to them by IP address, or you can add your home resolver to the DNS servers list. It’s very flexible, feel free to test this yourself.
Conclusion
Today we learned how to configure a Raspberry Pi with WireGuard and the Nettica VPN Service, to connect to our entire home network. We did this by enabling subnet routing through PostUp and PostDown scripts. This knowledge translates: You can do the same thing with a Linux-based host in the cloud. You might have to use a different interface name for your network connection, but everything else remains the same.
More Info
Check out our Getting Started Guide to learn more about making your own VPN, with or without a Pi.
If your home network is behind a carrier-grade NAT, this configuration will fail. However, we have a solution. Check out our relay services, which solves the problem regardless of your ISP.
